Last updated on: June 29, 2026
You might in certain situations want to modify an existing standalone SSRS report or IQA-SSRS report. To add or remove information from the report, you must download its RDL file and make adjustments to the SQL that the report uses.
Report changes are made in the SQL Server Data Tools (SSDT). iMIS SSRS reports are compatible with all versions of SQL Server Data Tools.
Note: To adjust an RDL file, you must download and use SQL Server Data Tools. For more information, refer to Setting up SQL Server Data Tools.
In This Article
- Modifying an existing standalone SSRS report
Modifying an existing IQA-SSRS report
Additional Information
Modifying an existing standalone SSRS report
Do the following to modify an existing standalone SSRS report:
- Find the SSRS report you want to modify under Reports, or in RiSE > Document system. The document type of these files in iMIS is Reporting Services Template
 .
. - Select the report template and click Download. The RDL file is downloaded to your local workstation.
- Launch your version of SQL Server Data Tools and create a new project. Select the Report Server Project type and name your project.
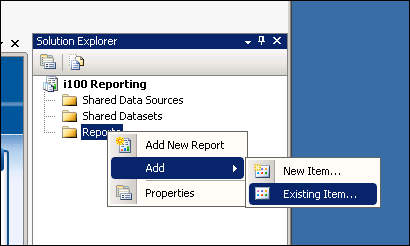
- Under the Solution Explorer, right-click the Reports folder and select Add > Existing Item.
- Select the RDL file downloaded to your local workstation and click Add.
- Modify the report as needed in SQL Server Data Tools.
- On your iMIS site, browse to the folder to which you want to save the RDL file. The simplest way to do this is to go to the Reports directory you want to use.
- From either location, select New > Reporting Services Template. It is best to create a new document in iMIS for your updated report instead of modifying the report provided by iMIS out-of-the-box, in order to avoid your changes being overwritten on upgrade.
-
Browse to select your revised RDL file:
- Enter a description.
- Click Upload.
You can also browse directly to the folder from the document system by going to RiSE > Document system (for example, for an Accounting report, browse to $/Accounting/DefaultSystem/Reports).
Your new RDL file should now appear in the list of templates.
Modifying an existing IQA-SSRS report
Do the following to modify an existing IQA-SSRS report:
- Find the SSRS report you want to modify under Reports or in RiSE > Document system. The document type of these files in iMIS is Reporting Services Template . For out-of-the-box iMIS reports, this file might be in the Reports folder, for example, $/CertificationManagement/DefaultSystem/Reports.
- Select the report template and click Download. The RDL file is downloaded to your local workstation.
- Find the IQA query that the report uses. Typically, the query will have the same name as the report and can be found by opening the Queries folder that appears above the list of reports.
- Select the query.
- Click Editto open the query definition.
- Click Save As to create a copy of the query and save it with a different name.
- Modify your new copy of the query to add any additional sources, display fields, filters, parameters, or sorting as required for your new report.
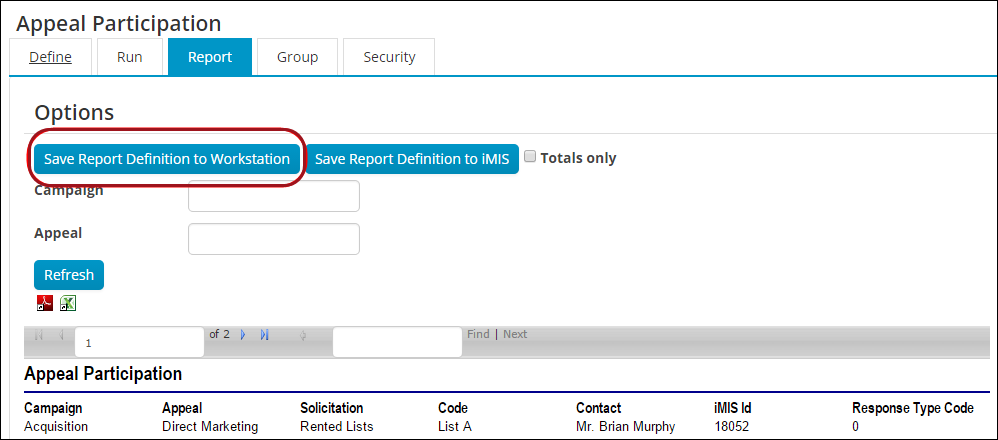
- Save this query’s Report Definition to your workstation:
- Select the Report tab.
- Click Save Report Definition to Workstation.
- Launch your version of SQL Server Data Tools, and create a new project. Select the Report Server Project type and name your project.
- Under the Solution Explorer, right-click the Reports folder and select Add > Existing Item.
- Select the RDL file downloaded to your local workstation and click Add.
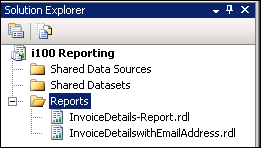
Repeat this process to also add the query’s Report Definition that was saved to your workstation. Both of your report templates (RDL files) should now be displayed in the Solution Explorer under the Reports folder.
- Right-click on the RDL for your new query and select View Code. This will open the XML for the report in the left-side pane.
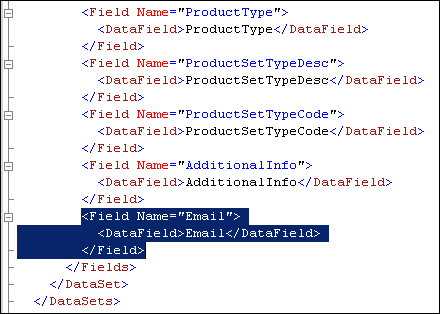
- Find the line that states <DataSet Name="IMIS"> (for reports using an IQA query as the source, the DataSet name will always be "iMIS"). Just below this, you will see a list of fields. Copy the <Field>code for each new field you added to the query (these should appear at the end of the list of fields).
For example, if you added the Email field, copy the section of code beginning with <Field Name=”Email”> and ending with </Field>. If you added multiple fields, you could select the code for all of the fields at once. Use CTRL-C or Edit > Copy to copy this section of code to your clipboard. - Right-click the RDL for the original report and select View Code. This will open the XML for that report in the left-side pane in a new tab.
- Find the line that states <DataSet Name="IMIS"> and scroll to the end of the list of fields below it. Paste the code you just copied at the end of the list after the final </Field> tag and before the closing </Fields></DataSet></DataSets> tags. After pasting in the code, it should appear identical to the same section in the XML for your new query.
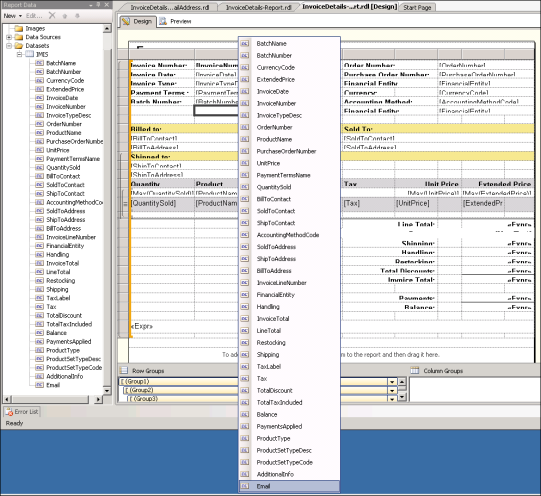
- Right-click the RDL for the original report and select View Designer. This opens another tab displaying the layout of the report.
- Expand the Datasets folder in the Report Data panel on the left. Next, expand iMIS. Your newly added fields should show up at the end of the list. Add your new fields to your report in the designer.
- Make any other layout or design changes you want to make to the report.
- When you are finished with the report, click File > Save Selected Items. Take note of the location of your revised report. The easiest way to find this is by looking at the Properties area, underneath the Solution Explorer. The full path to your revised RDL file is displayed.
- On your iMIS site, browse to the Templates folder where you want to save the RDL file. The simplest way to do this is to go to the Reporting directory you want to use.
- From either location, select New > Reporting Services Template.
-
Browse to select your revised RDL file:
- Enter a description.
- Click Upload.
Your new RDL file should now appear in the list of templates.
- Move up a level to the directory that contains the reports (for example, $/Accounting/DefaultSystem/Reports).
- Select New > Reporting Services Report.
- (Summary tab) Enter a name and description for your new report.
- (Sources tab) Browse to find the new Reporting Services Template you just created (example: $/Accounting/DefaultSystem/Reports/Templates/YourReportTemplate.rdl).
- Browse to find the saved copy of the query for your existing IQA-SSRS report. Now your Sources tab should have both fields populated.
- If you want to prompt for parameters at runtime, go to the Parameters tab and enable the Show parameters at runtime option.
- Click Save and browse to the appropriate directory for your new report (for example, $/Accounting/DefaultSystem/Reports), and click OK.
- Test your report by clicking Run. You can also test by refreshing your report directory so that your new report appears. Run the report.
Note: To determine which template is used, select the report and click Edit to open the report definition. You can select the Sources tab to see which template and IQA query is used by the report. You can only view which template and query are being used by the report with templates that have the  icon.
icon.
Note: If the Report Data panel is not displayed, you can open the panel by going to View > Report Data.

You can also browse directly to the folder from the document system by going to RiSE > Document system (for example, for an Accounting report, browse to $/Accounting/DefaultSystem/Reports/Templates).
Additional Information
- If you want to add a new parameter to your report, edit your IQA query. You do not need to modify the report template.
- The SSRS Report content item looks at the RDL only for the layout and looks at the IQA query for the data set and parameters needed. If you want to add a report to your site using the SSRS Report content item, you can create it in the same way outlined above.
- The Report Display content item looks at the RDL to figure out the data source, data sets and parameters needed for the report to be rendered. If you want to add a report to your site using that content item, you must also modify the SELECT statement in the code in SQL Server Data Tools (right above the list of fields; add any new fields and joins here).